Showing posts with label DIY. Show all posts

Wednesday, April 26, 2017

Unpredictability, my new Best Friend


Our re-enactment of the original bunny photo below

The one thing I had to learn to accept rather quickly with Motherhood is that unpredictability is your new best friend.  For a perfectionist like myself, you can imagine how big of a nightmare this was to digest.  Throw planning, scheduling and organizing out the window because at any given time anything and everything can happen to ruin all of your hard work and efforts.  You eventually learn that this is the new norm and that certain things are just out of your control. 

Case in point - family/maternity photo session.  Sounds pretty simple right  Book a photographer, plan a few outfits, choose a location, show up and smile! You would think...

The first challenge was not being able to secure a photographer.  After a few attempts, I thought hmm...who needs a Photographer?  We can just capture these moments by ourselves (I blame this decision and cloudy judgment on baby brain).  The second challenge came in the form of a missed nap.  Little Ally Rose, who had been putting down 3 hour naps for the past month decides to forego sleep on the day of the shoot.  The third challenge was a complete outfit malfunction...because everything stretches and becomes way too thin when your pregnant.  All challenges aside, we made it happen.

The funny thing about unpredictability is that it makes for the best memories.  Somehow we managed to get a few decent shots despite all the chaos and challenges.  Now, every time I look back at any of these photos, I can't help but smile because of Ally's grumpy expressions or the fact that we asked random strangers for help.  What made it even more special are the tender moments that daddy was able to capture of his girls.  So, I guess sometimes unpredictability isn't so bad. 

Don't be fooled by social media because it makes everything look so perfect.  We got so many compliments on the photos I posted, I'm sure people assumed we had them professionally done.  In reality, we were a hairline away from one of the most disastrous days.  Motherhood realness - nothing is perfect and you learn to roll with the punches.  Live in the moments and enjoy the memories because in the end, that's all you have. 


Monday, May 23, 2016

Some Bunny is One!

DIY bunny floral crown, Old Navy dress, Freshly Picked Moccasins, DIY Pallet Sign

I can't believe it's been a year since my baby girl has been born.  Life changed drastically, but in the most indescribable, amazing way.  Motherhood has been the most rewarding yet challenging experience, something I wouldn't trade in for the world. 

To celebrate surviving our first year, I started planning Ally's birthday months in advance.  I knew I wanted to do something simple and rustic, but not over the top.  There were a LOT of late night crafting sessions, Pinterest stalking, and empty bottles of wine. 

After settling on the theme, Some Bunny is One, I started making props that would work for both her 1st photoshoot and birthday party.  We were able to tie everything together so perfectly for a cohesive look.  From bunny crowns to floral signs and funfetti cakes, all the hard work paid off!  Thank you to everyone that shared in this special celebration with us!  We are so thankful to have you be a part of this special time in our lives. 

Here's a sneak peek from our photoshoot that was shot by my amazing photographer Jane and a closer look inside our party for the bunny that rules our world!

Lucy Paris dress from Revolve Clothing
DIY bunny floral crown, Old Navy denim dress, Lover + Friends maxi dress

DIY funfetti cake smash made with 5" molds, Cake Topper from CutsofConfetti


Naked cake by Final Touch Bakery, Sugar Cookies by Sweets by Gigi, DIY panna cotta, Cream Pan and Portos  


Monday, September 23, 2013

Manicure Mondays: DIY Black & Gold Edgy Nails


happy manicure monday lovers! for those of you who may not know, one of my growing hobbies is dabbling with nail art in my spare time. i am no expert by any means, but i love experimenting, being creative and seeing what different looks i can create. one of the looks i've been dying to re-create was done by my brilliantly talented friend Staci Nguyen for Actress/Singer, Ashley Tisdale. i finally had some time this weekend to experiment and since i was thoroughly please with the outcome, i thought i'd post a quick tutorial on how i achieved the look.
the inspiration
 
*the gel machine i use is from uv nails, all items can be found at your local beauty supply store
you will need
loose gold glitter
clear gel
gel base coat
gel top coat
black gel color
gel cleaner or rubbing alcohol


so i started the process with the regular base prep. i cut and filed my nails into more of a claw like shape and gently buffed the top of my nails. after the base coat, i used a clear gel and finger by finger i sprinkled on loose gold glitter. i gently patted each finger and tapped off any excess to ensure the glitter was evenly distributed. once the glitter was cured, i used some cleaner and wiped away any excess glitter on the cuticles.  i then applied another clear gel coat to smooth out the nail.  

once the glitter set, i used a black gel polish and painted tips straight across. i free-handed this process as the claw shape makes it extremely fool proof. once cured, i topped the entire nail with some top coat and filed away any glitter on the sides of the nails. i wiped the nails with the cleaner again and voila!
 the re-creation

overall, the process was a tad messy, but none the less, fairly simple for such a fancy look. give it a try and let me know how it goes! below are a few of the other nail looks i've created in the past. feel free to leave requests for any other DIY nail tutorials you would like to see!

Friday, November 12, 2010

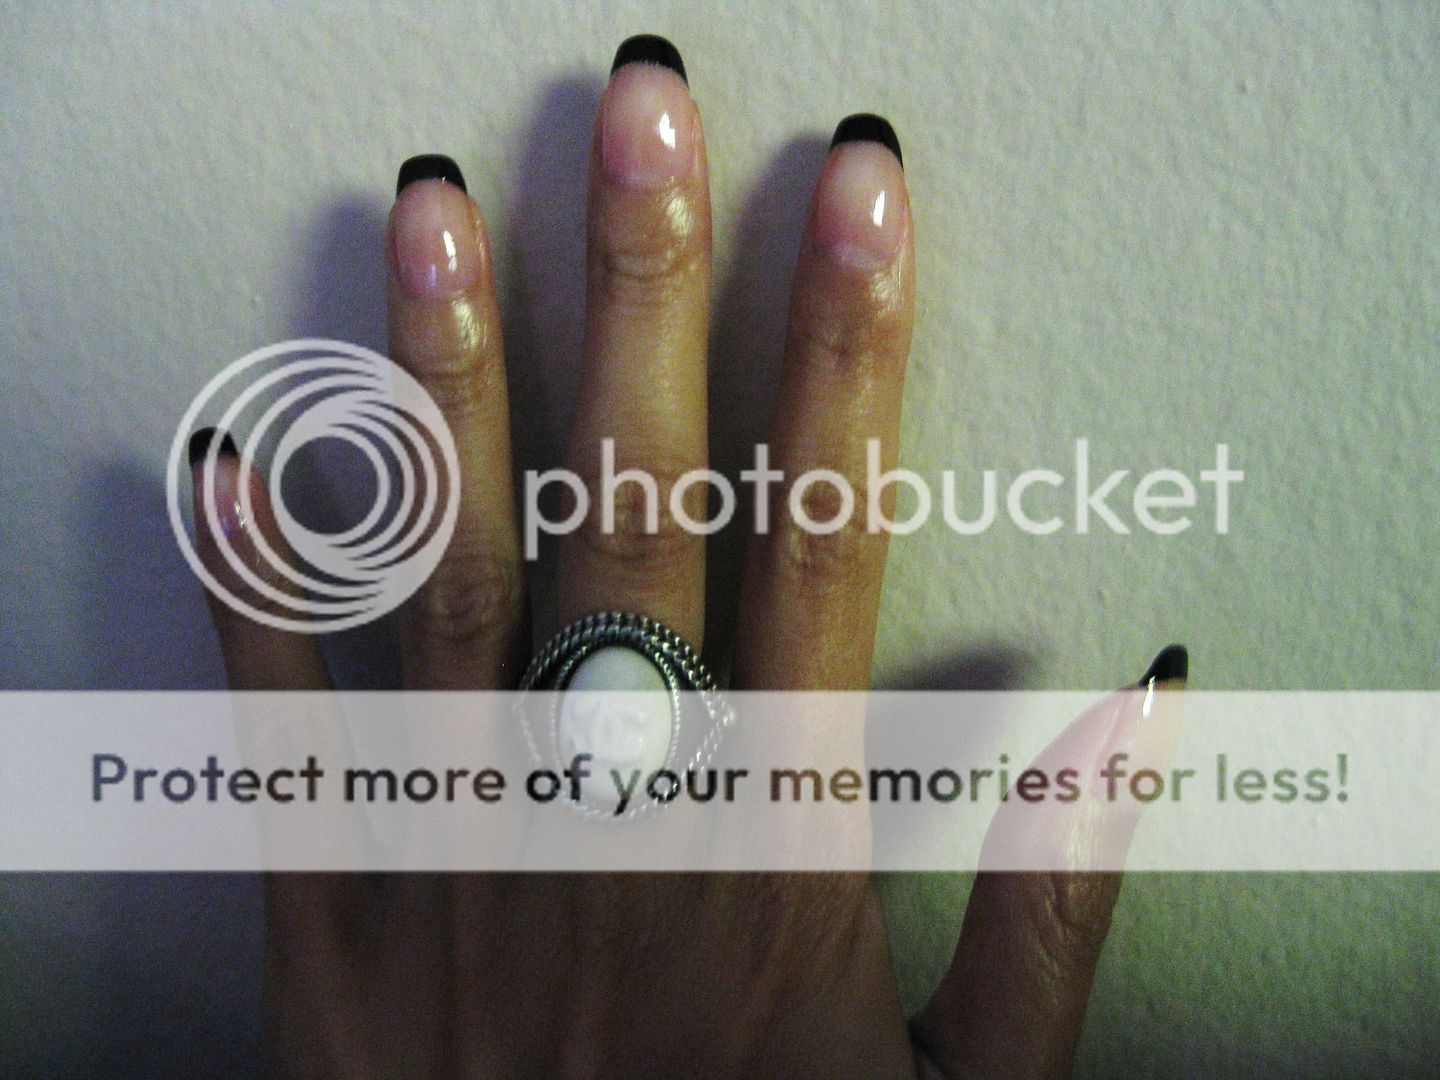
DIY: black french manicure

i love the juxtapose of pairing blush pink or neutrals with black, so i decided to experiment to see how it would look on my nails. i used my favorite opi neutral lacquer in passion, another favorite opi lacquer in black onyx, nailene perfect tips french tip stickers and of course the essentials, poshe base and top coat.


i started with the base coat, then applied the french tip stickers to the tips of my nails. i went over the tips with two coats of black onyx to create a nice black french tip. after letting it completely dry (very crucial step), i removed the strips and went over the remaining part of the nail with passion to create a pinkish, glossy look. *hint* it actually works best to paint your nail the opposite direction, from tip to base. then go over with the base coat and voila, a black french manicure. the color combo actually reminded me a little of chanel so i paired it up with my chanel cocktail ring. the look is super easy and has a feminine, but edgy feel. you could also switch it up with different color combinations.